Setting up "open times" on a teacher's schedule for students to book lessons.
Open times determine when you or your teacher are available to be scheduled for lessons!- Essentially, they indicate availability for new customers signing up on the widget and for current customers who want to reschedule their lessons.
- It is recommended to set up a wide schedule that reflects the actual availability of you or your teacher. This will help maximize the number of lessons that can be scheduled.
Note: Administrators do not require open times to schedule lessons on the calendar. They have the ability to schedule directly within the grey boxes displayed. Open times serve as guidelines for both new and current students to schedule or reschedule their lessons within these set parameters.
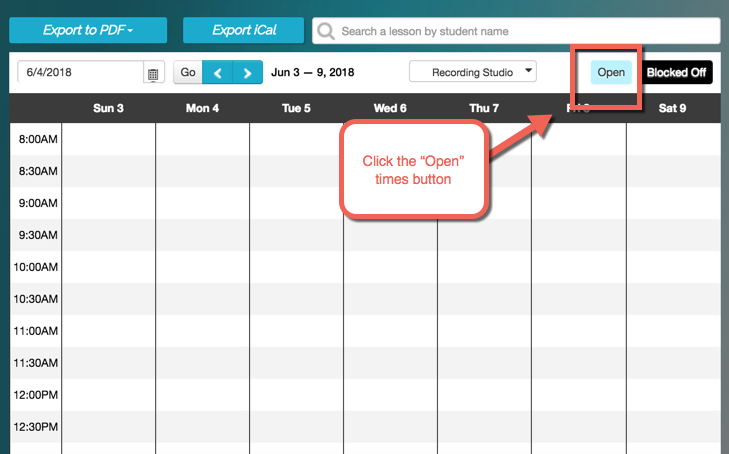
Step 1: Choose the "open" button in the top right corner of the schedule:

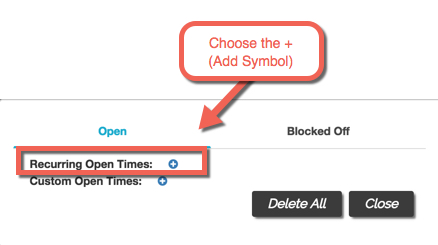
Step 2: Select the "+" symbol to add recurring open times:

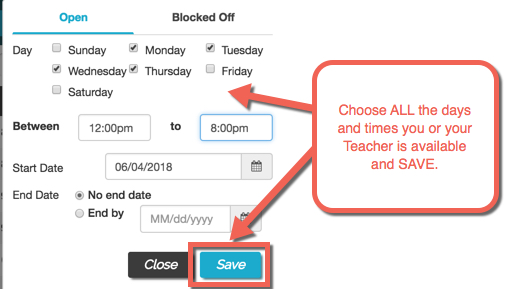
Step 3: Add the days and times during the week that you or your teacher is available to give lessons and click "save":

Note: If you wish to set different open times for various types of registrations (such as online lessons), you have the option to specify locations within the open times (the default is all). By including locations in the "Plan Builder" for the plans that students can purchase and schedule themselves, only those specific types will be displayed. This allows for more tailored scheduling based on different types of lessons offered.

In the "Plan Builder", the selected options will determine which open times are available based on the specified location:

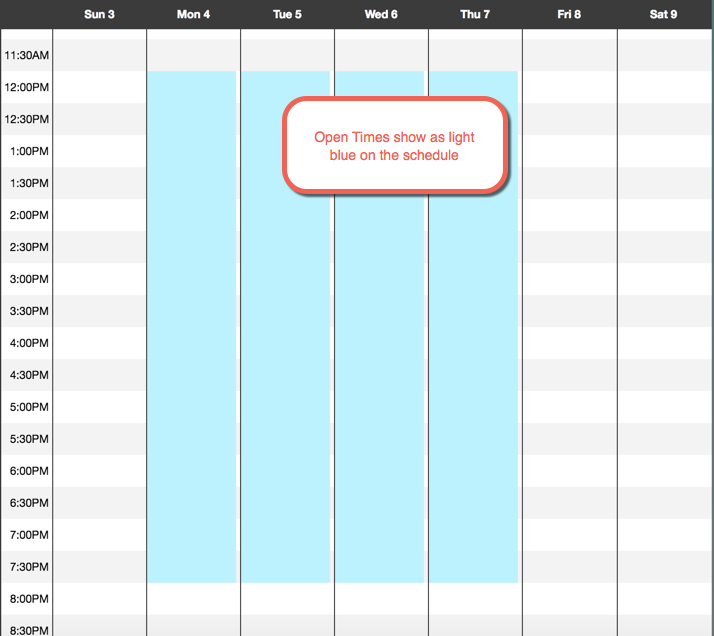
Step 4: You'll now see light blue open times on your schedule:

Checkout these other helpful links:
